- You are here:
- Home »
- Blog
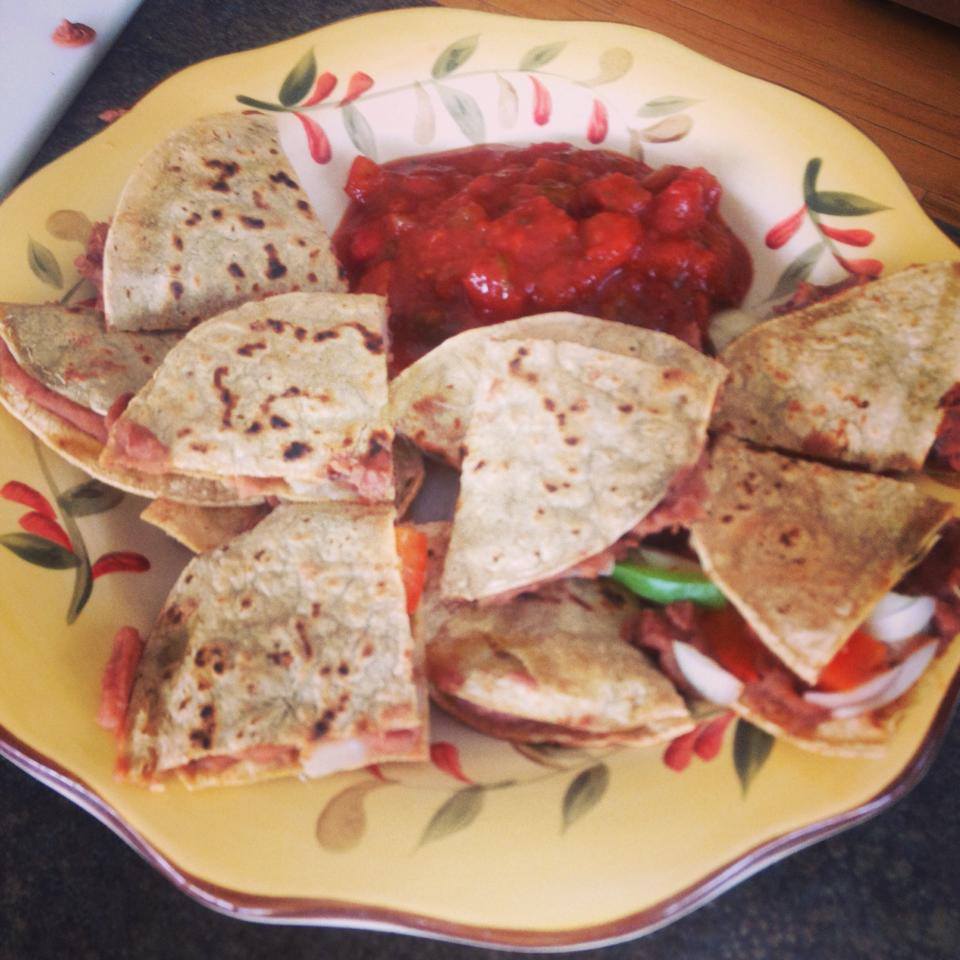
No Cheese Quesadillas
No fat refried beans are very creamy. No need for cheese or sour cream anymore as these are so tasty.
1 can of no oil refried pinto beans (I use President’s Choice Refried Pinto Beans)
1 green pepper (chopped)
1 red pepper (chopped)
1 yellow onion (chopped)
10 yellow no oil corn tortillas (makes 5 quesadillas)
Extra Chunky Salsa (as much as desired – I use President’s Choice Hot)
Instructions
Put about 1/4 of a can on a no fat corn tortillas, add chopped raw onion and green/red pepper. Add another corn tortilla and fry in frying pan dry (no oil) until crispy, flipping half way through. Add extra chunky hot salsa or whatever salsa you prefer. Mix in chili powder with the beans if desired.
Calories for 2.5 quesadillas cut into 10 quarters and using 1/2 can of refried beans is about 500 calories if you count that sort of thing. Very filling!
My Daily Oatmeal Breakfast – Plant-Based Lifestyle
Ingredients:
* 1 cup of rolled oats (not instant oats)
* 2 cups water
* 1/4 cup Grape Nuts for crunch (if I have them)
* 1 tbsp ground flaxseed (optional for omega 3)
* 1 cup banana milk (or you can use unsweetened almond milk or some other non-dairy milk)
* 1/2-1 cup defrosted from frozen strawberries
Instructions:
Cook oatmeal as per instructions on the bag (I microwave the oats and water for 5 minutes). I like mine cool so I put it in the fridge to cool for an hour. Add the flaxseed and Grape Nuts (if using), as well as the strawberries (or berries of choice). Blend a ripe banana with 1/2-1 cup of water until blended. Should only take 5 seconds or so. Pour milk on oatmeal.
If you prefer warm oatmeal, slice the banana on top and don’t make the banana milk. I eat this almost every day!
Note: Cereals are whole wheat based without many ingredients in Canada and hopefully you can find them as well. Strawberries are fresh in season and frozen the rest of the year. I buy frozen sliced strawberries and put them in a container in the fridge the night before to thaw, which creates juices.
30 lb Weight Loss! Plant-Based Lifestyle
Down 30 lbs as of July 1, 2013. I discuss the results and show a graph here.

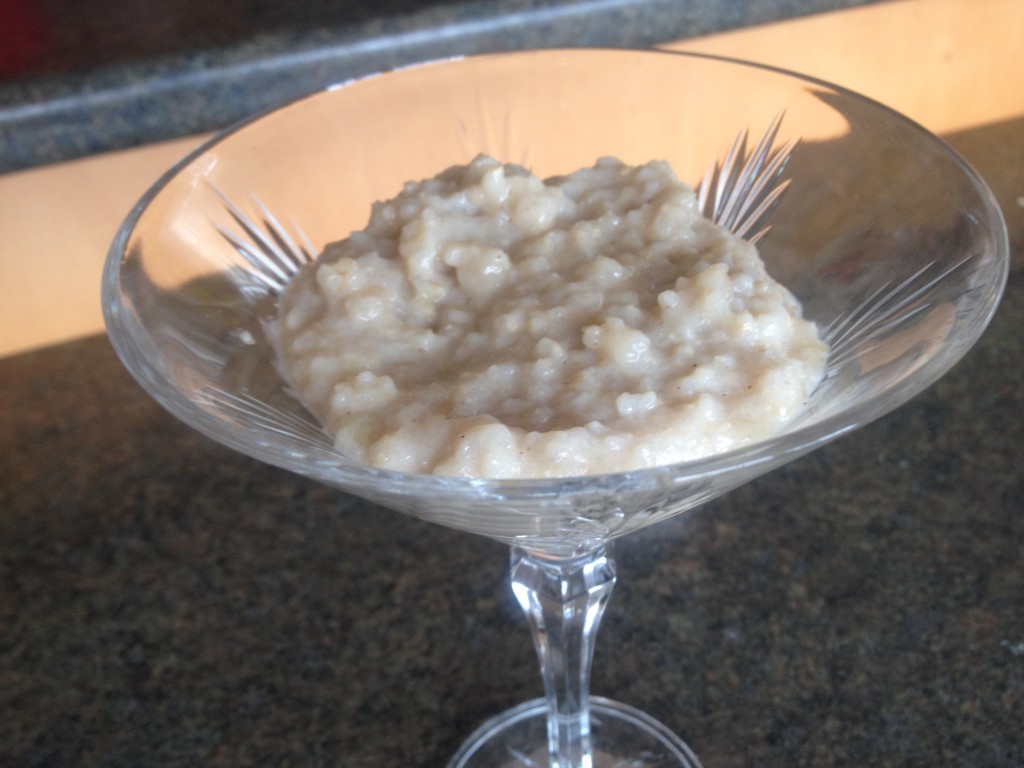
Rice Pudding OMG!
I usually make a batch of brown rice for my rice and beans but I had an inspiration to make some rice pudding. So I did some Googling and found this recipe by Dreena Burton. So below is my personal take on what I did for my pudding. As you know I like simple, quick recipes – well this one definitely is easy!
Ingredients
2 cups of cooked brown rice (I make batches and have lots leftover)
1 cup low fat organic soy milk (unsweetened if possible) – you can use almond or rice as well
1/2 tsp of cinnamon
1 tbsp brown sugar (optional depending on sweetness of your chosen milk or use a ripe banana)
*Many things can be done here – pinch of nutmeg, cacao, fruit like blueberries, etc.
Instructions
Blend 1.5 cups of rice (left 1/2 cup for later) with other ingredients and blend in Vitamix on high for 20 seconds or until it looks like everything is blended. If really thick after blending add more milk. Pour mixture into a pot, add the remaining 1/2 cup of rice (for texture) and cook on medium heat until thick.
As you might know I wing a lot of things so feel free to try some other options, depending on your tastes and how sweet you like your pudding. Depending on the sweetness of your non-dairy milk you can also add a ripe banana, cacao, etc.
Two ideas to try are subbing my banana milk for the other milk, and also added cacao to make a banana chocolate pudding.
This pudding is amazing warm and tastes great cold as well, and can be for breakfast, snack or dessert.

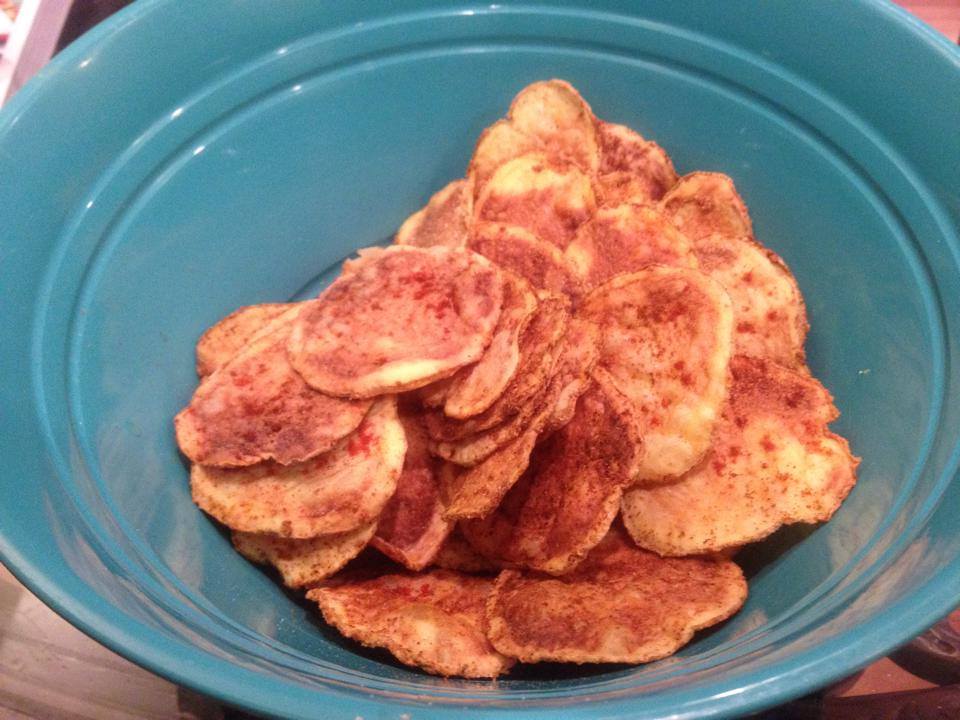
Potato Chips – Fat Free Guilt Free
Prior to starting this plant-based diet I would eat an entire bag of potato chips at least once a week – salt and vinegar or all dressed mostly, and sometimes with chip dip. I would have stomach aches and feel bloated even when I went to bed at night. But I kept doing it.
I recently decided to give making potato chips a try. The first time I soaked the sliced potatoes in vinegar for hours and then baked them. They weren’t that great. I think they were sliced too thin for one.
This time I found a way to microwave them and they get super crunchy. If you’re worried about the safety of microwaves check out this newsletter by Dr. McDougall.
Update: I now use Top Chips trays stacked in 2 layers without flipping.
Wash a potato and slice it think using a knife or I use a mandoline slicer. The thickness is up to you but mine are about 1/8″ thick. I don’t like them too thin but if you like that you could go as thin as you want which would require the mandoline. I encourage improvisation and trial and error here to find a thickness you like.
I tried mixing the slices with spices in a bowl but most of the potatoes stick together so they don’t get covered. So I’d put a piece of parchment paper on top of the microwave plate and lay the slices out first. Note: I now use two stacked Top Trays. Then put the spices on – premix the spices in a cup or shaker and then sprinkle on each slice.
The microwaving times will vary depending on your microwave and size of potato. Microwave for 6 minutes on one side, then flip the slices over, sprinkle on more spices and microwave in 1 minute increments. When they start to brown watch carefully – you want crunchiness but not overcooked. Roughly 6 minutes on first side and 6 minutes on other side but don’t leave unattended!
I’ve been also eating these spiced or plain with my ranch dip.
Ingredients (many variations of spices can be used)
One medium potato (any kind – I use yellow-fleshed)
1 tbsp Chili powder
1 tsp Onion Powder
1 tsp Paprika
1 tbsp Nutritional Yeast
1/2 tsp cayenne pepper (adjust to heat preference)
1 tsp Salt (optional, whatever kind you prefer)
Instructions:
Cut potato into thin slices (1/8″) – thinner or thicker as preferred. Put parchment paper on microwave plate (mine is built-in glass plate) and lay slices on. Mix spices and sprinkle on each potato. Microwave for 6 minutes on one side. Flip slices over and microwave in 1 min intervals until very crunch – do test bites along the way). Could be 5-6 minutes on the second side. So I put 6 minutes in and then pause at various intervals to check. Make sure not to overcook and burn, watching the 2nd half of the cooking carefully. Very time consuming!
Something I’m looking into getting is a microwave chip holder so no flipping will be required and will probably cook faster.
Another option is to soak the slices in malt vinegar for a few hours and then do the same thing with some optional salt sprinkled on the chips. Since I couldn’t wait I made these once and spritzed on some vinegar as I ate them which wasn’t bad. Or you could get some of the Gourmet Fries Seasonings.
My latest method:
Method if you don’t have Top Chips Trays, using parchment paper:
Plant-Based Low Fat Meal Examples – Yes They’re Filling and Tasty!
I run through a variety of plant-based meals that I’m making these days. Great for guys, people trying to get off of meat and dairy, or raw til 4 types.
Kicking The Caffeine Habit – Plant-Based Diet
I started drinking coffee in university during my engineering days. I’m sure I needed the energy boost. But I really remember drinking coffee at work when I felt tired or needed to get away from the desk for a few minutes. I also found it to temporarily suppress my appetite. I always seem to be fighting hunger so it would help although I would add cream and sugar so I probably wasn’t doing myself any favours.
For the past few years I’ve been working from home and generally drinking 2 cups of coffee in the morning. I don’t do it for energy but it’s become a daily ritual over the past 25 years. In Canada it’s often cold but in the morning it’s nice to have a nice warm roasted drink of coffee.
There are some negative aspects to coffee such as more frequent urination, adrenal stimulation, acidity, and laxative effects, but also many benefits as mentioned by Dr. Greger in various videos – although he does recommend green tea instead. The fact that stopping a food has all these side effects might be a good indication that it’s not the best thing to drink! I also noticed that I don’t really like coffee on it’s own without adding non-dairy milk and sugar as it has a bitter flavour.
I’ll be honest, the idea of giving up coffee altogether was something I was very resistant to. I would focus on Dr. Greger’s videos as a way to justify it. But since I tend to trust doctors like Dr. McDougall and Dr. Esselstyn I decided to give it a try.
Because there can be side effects like headaches I decided to phase out the caffeine gradually. I use 6 small scoops of coffee when I brew it, so I start swapping in decaf for caffeinated coffee, I scoop at a time. I went from 5 caffeine and 1 decaf scoops for 2-3 days to eventually 2 caffeine and 4 decaf scoops. Each scoop reduction was a few days so a few days at 5, then 4, etc.
There were definitely some headaches – in the back of the head, tension type headaches along with some eye strain. My wife Bonnie also had issues so we took some Tylenol – we still have to function during the day, especially her studying Accounting at the moment.
When I got down to 2 scoops caffeinated to 4 scoops decaf I received my order of Dandy Blend from Amazon which I had heard good things about. Dandy Blend is a combination of ingredients such as roasted chicory, beets, barley, rye and dandelion roots. They say you don’t have any side effects but I can’t be sure as I had already scaled down to some extent.
Dandy Blend is very rich and has a roasted flavour like coffee. I just heated up a cup of water and added about 1.5 tsp of Dandy Blend. I also added some sweetened soy milk. Feel feel to vary things, different nut milks or none at all, add cinnamon or other spices, and adjust the amount of Dandy Blend to your strength preferences.
My recommendation would be to scale down the caffeine as I did but also drink a cup of Dandy Blend which they say helps with the withdrawal symptoms.
