Category Archives for Snack
Mushroom Baguette Appetizer
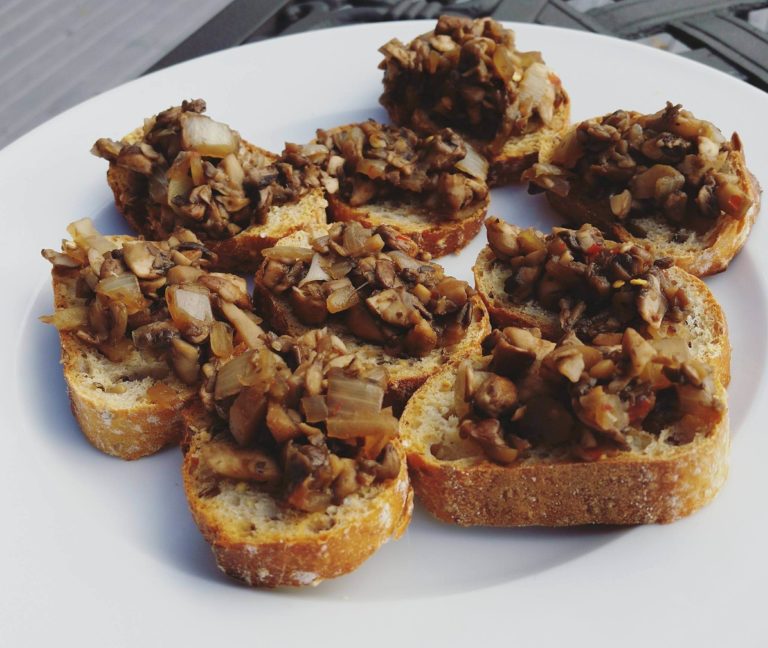
I never liked mushrooms but these are amazing!
Ingredients:
-1 pound (454 g) of cremini mushrooms
-1 garlic clove, pressed
-1 medium to large onion, diced
-1 whole grain baguette, sliced into 18 or more slices
-1/4-1/2 tsp black pepper (the more the hotter/spicier it will be)
-1/2 tsp red pepper flakes (add more if you like it really hot)
-Optional salt to taste on each baguette slice (or use a little veggie stock powder when cooking onions)
Instructions:
Preheat oven to 350-400F. Slice up baguette into 18 or more slices. Put on non-stick Silpat sheet (or parchment paper). Bake slices for 10-20 minutes until crispy (keep an eye on) but not burned or too brown (depending on how you like it).
Dry fry onions in a non-stick pan on high heat, until starting to brown then add a little water to bring out the sugars (caramelize). Repeat this process as the water burns off. As the onions brown then add the pressed garlic clove and chopped mushrooms. The mushrooms will release some liquid so cook until the liquid is basically burned off (I don’t like it too dry). Add the black pepper and pepper flakes as the liquid is being cooked off.
Put the mushrooms on the slices and eat! See video recipe below for more details.
Easy No Oil Salad Dressing – Jane Esselstyn 3-2-1 Recipe
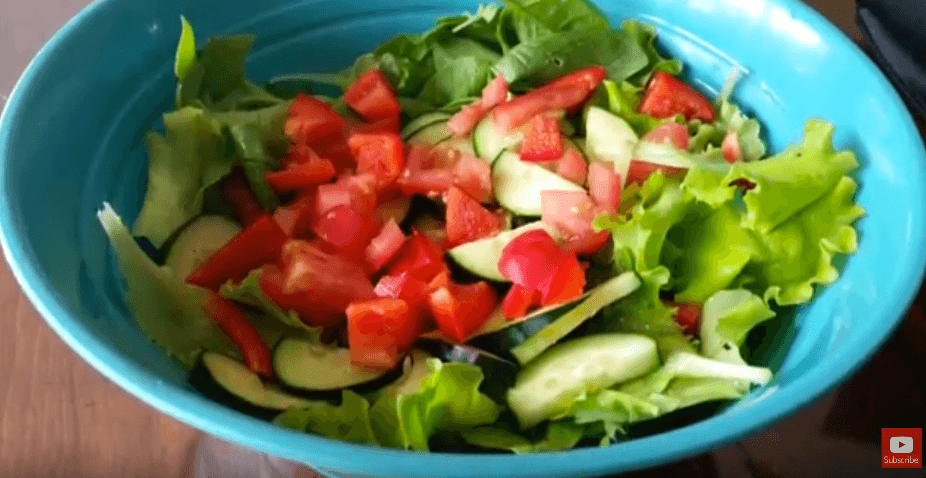
Jane Esselstyn 3-2-1 Salad Dressing
3 tbsp balsamic vinegar
2 tbsp dijon mustard
1 tbsp maple syrup (or agave, etc)
Use 3-2-1 ratio for other quantities, try other types of vinegar, mustard, etc.
Whole Wheat Baguette
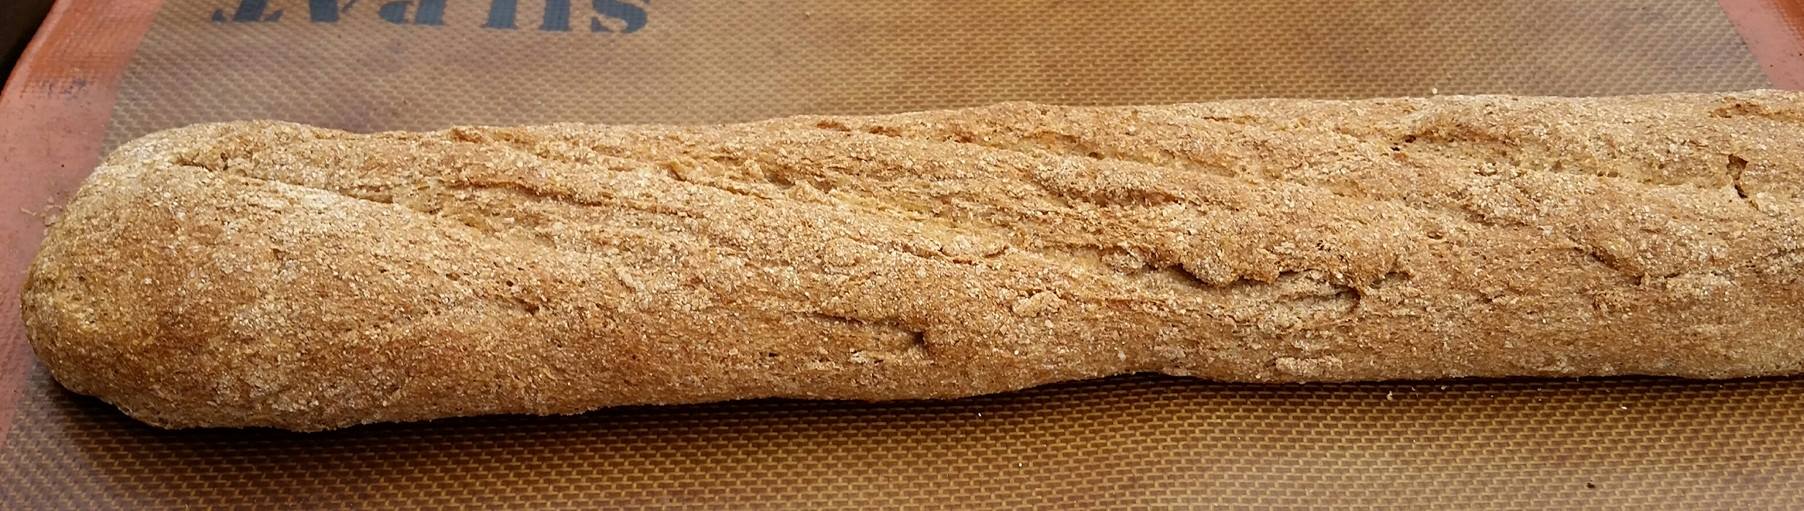
Making bread can be tricky. I’ve seen so many recipe variations out there that it can be overwhelming! Many recipes call for soakers, spongers, waiting days for dough to rise, punching the dough down multiple times, putting dough in the fridge and so many other possibilities. But I usually try to find something that is fairly quick and easy. All I can say is if you have any problems, try again and be willing to make variations in the recipe! Some of the instructions will come with caveats or possible modifications. Check back over time as I may try different things and make it better. I can’t predict what every variation might turn out like as I’ve only tried a few.
If you don’t have vital wheat gluten you can try it without. I need to try some more variations and see what works best, it’s supposed to help with the texture as whole wheat flour has a harder time developing gluten. I also read it’s not really necessary depending on how fine the flour particles are. So we’ll see.
Ingredients:
1 tsp active dry yeast
1 tsp sugar (any sweetener should do)
1 cup warm water (~110 deg. F). I use warm water from my tap (filtered/softened well water).
2 cups of whole wheat flour (I use Speerville Organic). Before measuring stir up the flour to loosen as it can get compacted.
1 tsp salt (this is optional if you eat the bread with other things like jam, without salt the bread itself is a little bland if not toasted)
1/2 tbsp of vital wheat gluten, optional and depends on whole wheat flour used.
Instructions
Put water in bowl and add yeast and sugar, stir a couple times to mix. Let sit for 10 minutes. Yeast should bloom, you’ll see it go across the top of the water. If it doesn’t the yeast might be dead or the water was too hot/cold.
Put the flour, vital wheat gluten (if using) and salt in a bowl, mix thoroughly with a spoon (I eventually dive in with my hands once a ball starts to form). Add the flour mixture slowly to the water/yeast mixture and mix until it starts to forms a ball. It will be a bit sticky (was for me in a humid climate). If you’ve added all the flour and it’s still really sticky add some more flour slowly as you mix with your hands. The flour/water ratio can vary depending on brand of flour. The dough should have a little stickiness but still be workable. Knead the dough for a few minutes. I did this is the bowl as I added flour. I aim for a play-dough like feel. Cover the bowl in a damp cloth and let the dough rise for an hour (or more if you have time). I found it stop rising after a certain point so it didn’t seem worth waiting any longer.
Take the dough out and lay on a 11×17″ baking tray lined with a silpat non-stick baking sheet. If you have parchment paper you can use that. Roll the dough out with your hands so that it forms a long thin baguette shape, almost touch the ends of baking tray. Score the baguette using a sharp knife – basically make 1/2 inch deep cuts that are roughly 6 inch long slices in the bread at a slight angle to the bread lengthwise, a few inches apart (see above photo, my scoring technique still needs work!)
When ready to bake the bread, preheat oven to 425F, covering the dough with the damp cloth again until ready to bake. Put an oven-safe baking dish with 1 cup of water on the bottom rack of the oven. The steam will create a good crust on the bread. When the oven is heated put the dough in the oven on the non-stick baking tray (I use silpat sheet). Bake for 20-30 minutes (depending on your oven) until a good crust is formed and when sticking a knife in the bread it should come out with no dough on it. When the bread looks cooked I turn off the oven and leave it in there to cool with the oven door open which can increase the crispiness. You can spray water on the dough halfway through baking as well which helps form a thick crust, which is the best part of this baguette! Toasting this makes it even better either in a toaster or in the oven.
You can double this recipe to make a loaf of crusty bread as well, if you have a loaf tin which I need to get now!

Vegan Tzatziki Sauce
This recipe is a starting point for your own modifications. Don’t feel you have to use all the ingredients or that you can’t add anything. Experiment!
Ingredients:
-1 package silken tofu (extra firm if possible)
-2 teaspoons lemon juice (use real lemons if preferred)
-1 peeled and shredded cucumber
-2 teaspoons dill pickle juice (from jar of pickles) or apple cider vinegar
-1 or 2 cloves of garlic chopped (2 is pretty garlicky)
-1 tsp onion powder
-1/2 teaspoon ground black pepper
-1 teaspoon salt (optional)
Instructions:
Blend everything in blender (I use Vitamix). Optionally you can leave out the shredded cucumber during blending and add it after. I often add more vinegar and lemon juice, or even dill pickle juice from a jar of pickles. Lately I’ve been using dill pickle juice instead of apple cider vinegar as I prefer the taste. I was often using the soft silken tofu which gets to thin if you add too much liquid but the firm silken tofu can tolerate more added liquid. Put mixture in fridge for a couple hours or more to cool and for flavours to combine.

Cauliflower Wings/Bites
As you know I tend to eat the same things now that I’ve developed a number of tasty recipes. But every once in a while I like to try something new. My latest discovery is these cauliflower wings (or bites) – I was blown away by the texture. This could easily replace some of the soy chicken products if you happen to use them, and make many meat eaters pretty happy as well. See my video recipe as well at the end of this post.
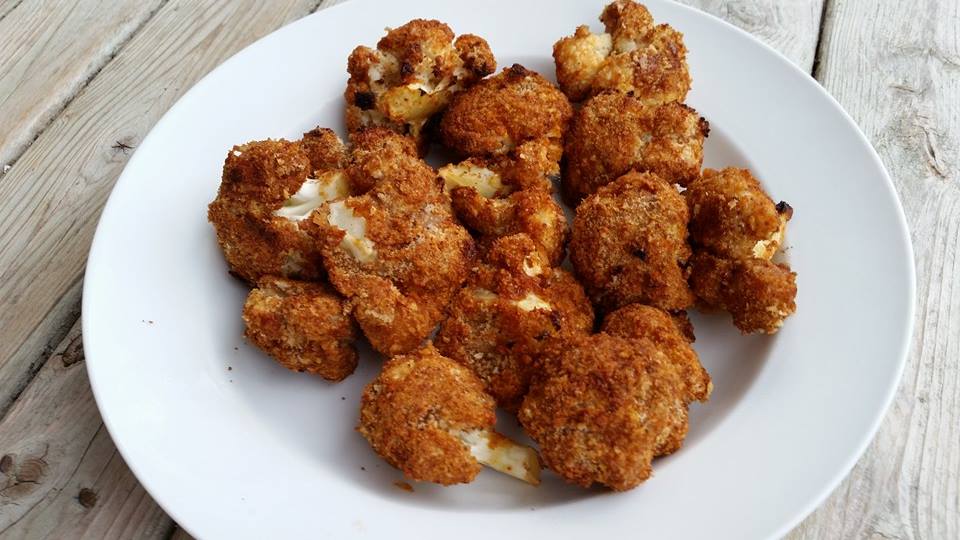
Ingredients:
-1 head of cauliflower
-1 cup flour (I used whole wheat, others use chickpea flour, etc)
-1 cup water (or unsweetened almond milk)
-spices (optional such as onion/garlic powder, nutritional yeast, salt – I didn’t add)
-1 cup of breadcrumbs (I made them with 5 pieces of whole wheat bread baked in oven until dried out, blended with dashes of onion/garlic powder). Enough to coat your cauliflower florets, you may need more. UPDATE: I used corn flake crumbs today, omg so crispy! Note: they have some added sodium and sugar.
-1/2 cup barbecue sauce (I used a no oil regular or garlic sauce, whatever you prefer such as buffalo sauce)
–Tabasco sauce (add to sauce to taste for desired heat tolerance, lots of hot sauce options that you may prefer)
Instructions:
Preheat oven to 450F. Wash and cut cauliflower into florets (bite sized pieces). Mix the flour, non-dairy milk and optional spices and whisk to combine in a large bowl. Put the florets into the flour mixture and mix to coat each floret. Then dip each floret into a bowl of bread crumbs and lay onto a baking sheet lined with silpat non-stick sheet (or parchment paper). Repeat until all florets are coated, breaded and put onto sheet.
Bake the florets until they are crispy and browned, about 15-20 minutes. You can eat them like that dipping them in your favorite bbq sauce or ranch dip. But we usually do a second bake so while the wings are baking, mix the bbq sauce and tabasco (if using) and put into a large bowl. Then take the florets out of the oven when browned and crispy, use spatula to scrape off the florets into a bowl that contains the bbq sauce mixture. Coat each floret in bbq sauce then re-bake for another 20 minutes. it takes a while for the florets to crisp up again.
Options:
You can avoid re-baking and just dip the baked breaded florets in bbq/hot sauce. You can also bake them without breading them. Add some celery sticks and this amazing ranch dip.
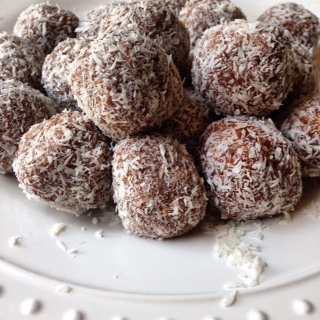
Chocolate Date Oat Balls – Plant-Based Diet
These chocolate date oat balls are really tasty!

Rice Pudding OMG!


I usually make a batch of brown rice for my rice and beans but I had an inspiration to make some rice pudding. So I did some Googling and found this recipe by Dreena Burton. So below is my personal take on what I did for my pudding. As you know I like simple, quick recipes – well this one definitely is easy!
Ingredients
2 cups of cooked brown rice (I make batches and have lots leftover)
1 cup low fat organic soy milk (unsweetened if possible) – you can use almond or rice as well
1/2 tsp of cinnamon
1 tbsp brown sugar (optional depending on sweetness of your chosen milk or use a ripe banana)
*Many things can be done here – pinch of nutmeg, cacao, fruit like blueberries, etc.
Instructions
Blend 1.5 cups of rice (left 1/2 cup for later) with other ingredients and blend in Vitamix on high for 20 seconds or until it looks like everything is blended. If really thick after blending add more milk. Pour mixture into a pot, add the remaining 1/2 cup of rice (for texture) and cook on medium heat until thick.
As you might know I wing a lot of things so feel free to try some other options, depending on your tastes and how sweet you like your pudding. Depending on the sweetness of your non-dairy milk you can also add a ripe banana, cacao, etc.
Two ideas to try are subbing my banana milk for the other milk, and also added cacao to make a banana chocolate pudding.
This pudding is amazing warm and tastes great cold as well, and can be for breakfast, snack or dessert.
Potato Chips – Fat Free Guilt Free
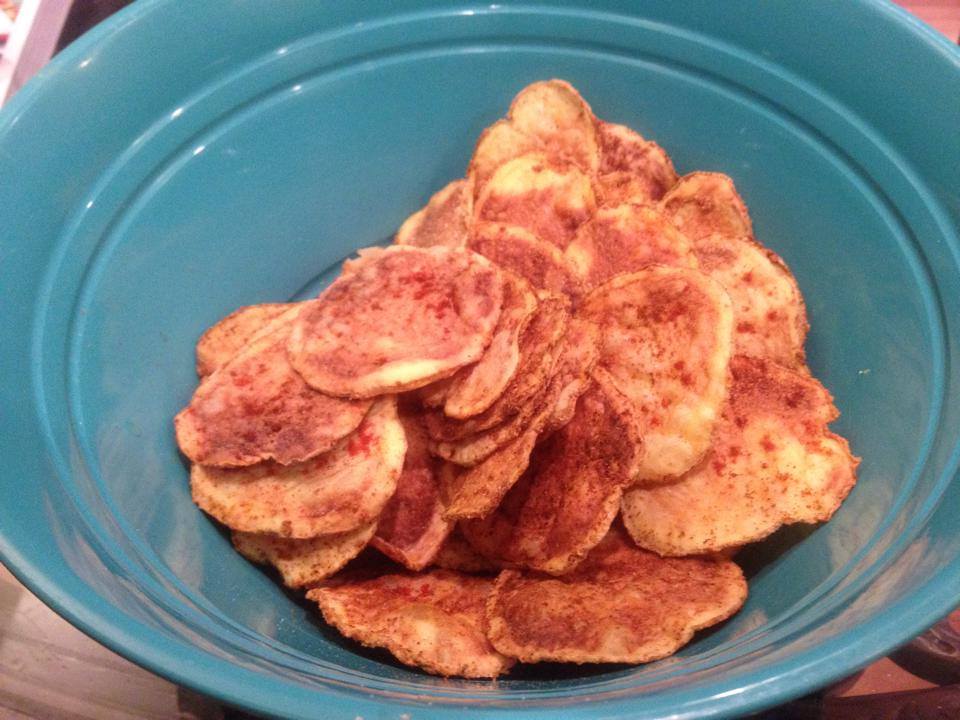
Prior to starting this plant-based diet I would eat an entire bag of potato chips at least once a week – salt and vinegar or all dressed mostly, and sometimes with chip dip. I would have stomach aches and feel bloated even when I went to bed at night. But I kept doing it.
I recently decided to give making potato chips a try. The first time I soaked the sliced potatoes in vinegar for hours and then baked them. They weren’t that great. I think they were sliced too thin for one.
This time I found a way to microwave them and they get super crunchy. If you’re worried about the safety of microwaves check out this newsletter by Dr. McDougall.
Update: I now use Top Chips trays stacked in 2 layers without flipping.
Wash a potato and slice it think using a knife or I use a mandoline slicer. The thickness is up to you but mine are about 1/8″ thick. I don’t like them too thin but if you like that you could go as thin as you want which would require the mandoline. I encourage improvisation and trial and error here to find a thickness you like.
I tried mixing the slices with spices in a bowl but most of the potatoes stick together so they don’t get covered. So I’d put a piece of parchment paper on top of the microwave plate and lay the slices out first. Note: I now use two stacked Top Trays. Then put the spices on – premix the spices in a cup or shaker and then sprinkle on each slice.
The microwaving times will vary depending on your microwave and size of potato. Microwave for 6 minutes on one side, then flip the slices over, sprinkle on more spices and microwave in 1 minute increments. When they start to brown watch carefully – you want crunchiness but not overcooked. Roughly 6 minutes on first side and 6 minutes on other side but don’t leave unattended!
I’ve been also eating these spiced or plain with my ranch dip.
Ingredients (many variations of spices can be used)
One medium potato (any kind – I use yellow-fleshed)
1 tbsp Chili powder
1 tsp Onion Powder
1 tsp Paprika
1 tbsp Nutritional Yeast
1/2 tsp cayenne pepper (adjust to heat preference)
1 tsp Salt (optional, whatever kind you prefer)
Instructions:
Cut potato into thin slices (1/8″) – thinner or thicker as preferred. Put parchment paper on microwave plate (mine is built-in glass plate) and lay slices on. Mix spices and sprinkle on each potato. Microwave for 6 minutes on one side. Flip slices over and microwave in 1 min intervals until very crunch – do test bites along the way). Could be 5-6 minutes on the second side. So I put 6 minutes in and then pause at various intervals to check. Make sure not to overcook and burn, watching the 2nd half of the cooking carefully. Very time consuming!
Something I’m looking into getting is a microwave chip holder so no flipping will be required and will probably cook faster.
Another option is to soak the slices in malt vinegar for a few hours and then do the same thing with some optional salt sprinkled on the chips. Since I couldn’t wait I made these once and spritzed on some vinegar as I ate them which wasn’t bad. Or you could get some of the Gourmet Fries Seasonings.
My latest method:
Method if you don’t have Top Chips Trays, using parchment paper: